KEY TAKEAWAYS
- Halloween toe nail designs can range from cute pumpkins and ghosts to dark gothic, glam, and minimalist pedicures.
- Detailed artwork works best on larger toenails, while simple symbols and solid colors suit shorter nails.
- Choosing the right finish, allowing polish to dry properly, and protecting the final design can help your Halloween pedicure stay polished.
Halloween toe nail designs are an easy way to bring a little October fun to your look without committing to a full costume. A tiny ghost or pumpkin can be enough, while darker shades and metallic details give you something moodier for Halloween night.
I’ve picked a mix of cute, spooky, glam, and simple ideas that make sense on actual toenails and still look good with sandals or open-toe shoes.
20 Halloween Toe Nail Designs to Try This Season
The best Halloween toe nail designs include pumpkins, ghosts, spiderwebs, black French tips, vampire red, gothic gold, and minimalist spooky accents. For short toenails, keep detailed artwork on the big toes and use simple colors on the smaller nails.
1. Jack-O’-Lantern Toe Nails with Tiny Pumpkin Faces
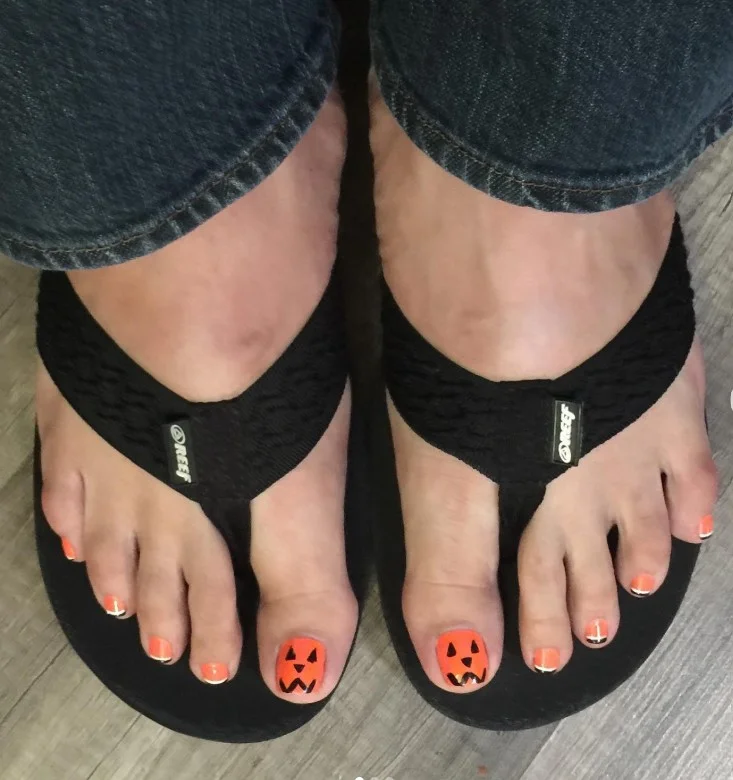
Nothing feels more Halloween-ready than a tiny pumpkin staring back from your big toe. Start with a warm orange base, then add small black eyes and a crooked little smile; a tiny stem on top makes the face even more recognizable. The smaller toes can stay orange for a cheerful finish, or you can add black to make the pumpkins pop.
Pro Tip: Do the black details after the orange has dried completely, and use a very small brush for the mouth.
2. Spooky Black French Tips with Silver Webs
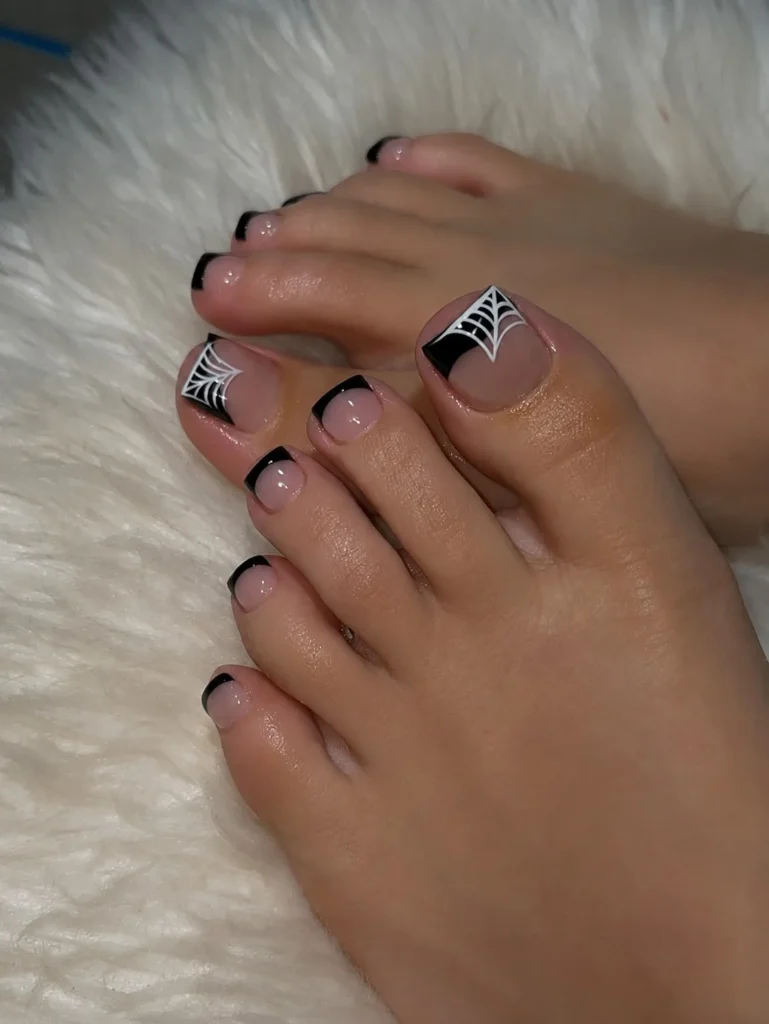
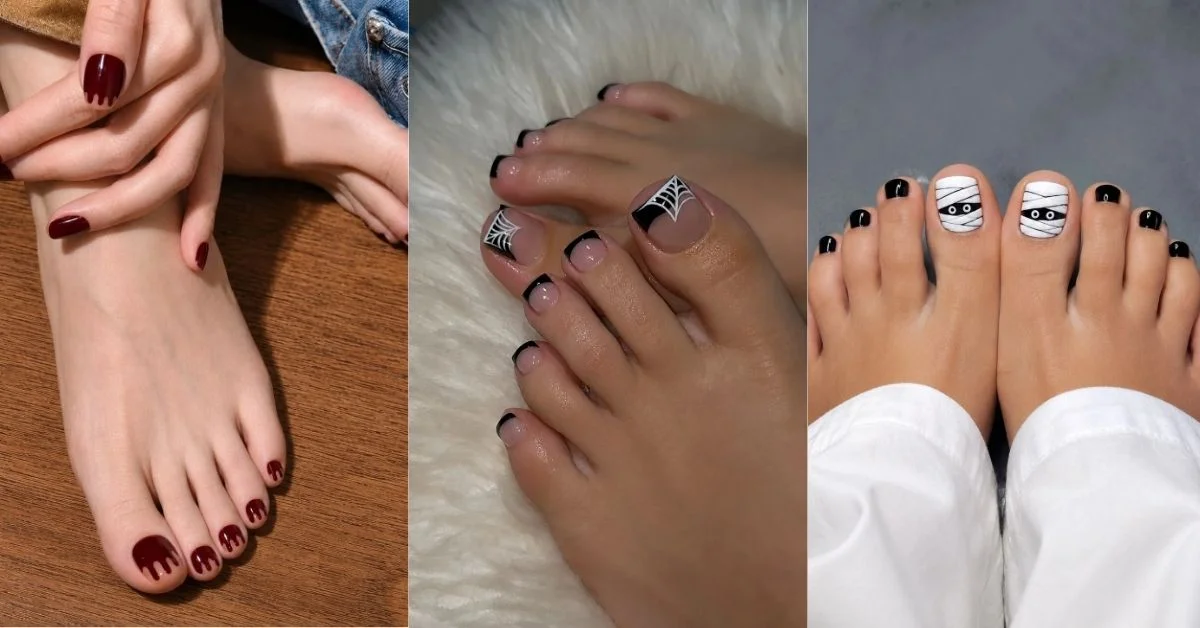
This is the one to choose when you want Halloween without a cartoonish look. A sheer base with crisp black tips feels polished on its own, while a few silver spiderwebs bring in the spooky detail. Put the webs on the big toes and let the other nails stay simple; there is no need to decorate every inch.
Pro Tip: Silver striping polish makes the web lines much easier to control than a thick glitter polish.
3. Cute Ghost Toe Nails on a Milky White Base
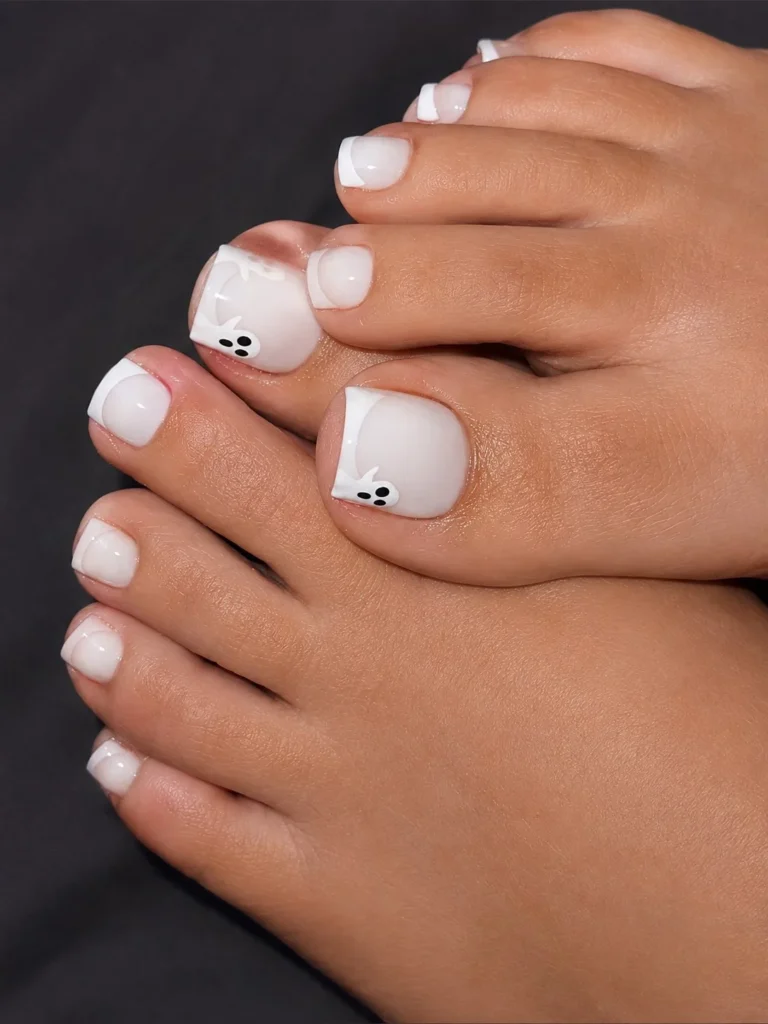
Ghosts do not have to look scary. A milky white base, rounded ghost shapes, and two tiny black eyes create a sweet little pedicure that works especially well with cozy fall clothes. Give one ghost a surprised expression and another a tiny smile for a handmade feel. If you prefer a quieter look, one ghost on each big toe is plenty.
Pro Tip: Use a dotting tool for the eyes so both sides stay small and evenly spaced.
4. Deep Crimson Drip Pedicure with Negative Space
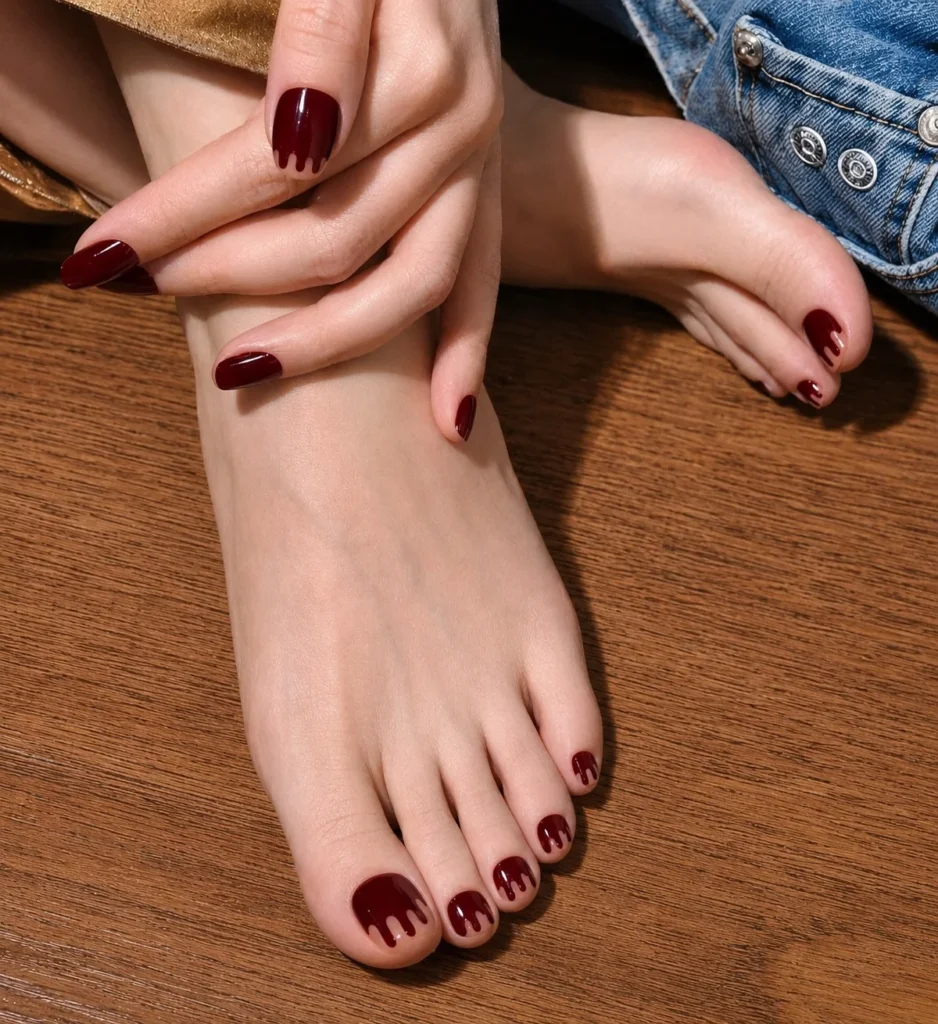
Skip the bright red and reach for a deep wine or crimson shade instead. Let the color drip over a bare-looking base, leaving some space between the shapes so the design has room to breathe. It has that dark vampire feel without needing fangs or other obvious Halloween symbols. A glossy finish makes the crimson look especially rich.
Pro Tip: Use a fine nail-art brush and dotting tool to create connected drops, starting with the larger shapes before filling in the smaller details.
5. Purple Spiderweb Toe Nails with Tiny Black Spiders
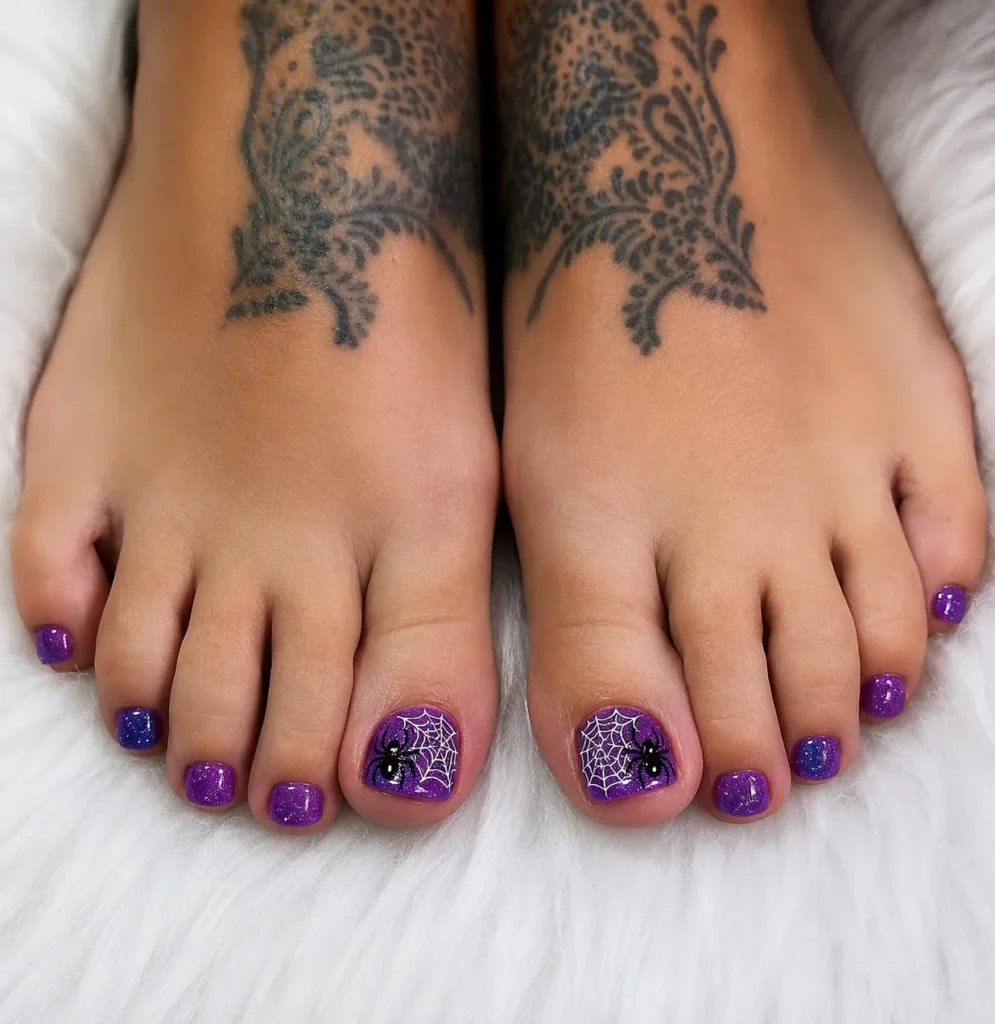
Purple and black give spiderweb artwork a witchy feel that is a little different from the usual orange palette. A rich purple base makes the black web lines easy to see, while one or two tiny spiders add the fun detail. This design is particularly nice if you already wear dark colors during fall and want your pedicure to fit the rest of your wardrobe.
Pro Tip: Paint the longest web lines first and add the curved sections afterward; it is much easier to keep the web balanced that way.
6. Classic Orange and Black Halloween Pedicure
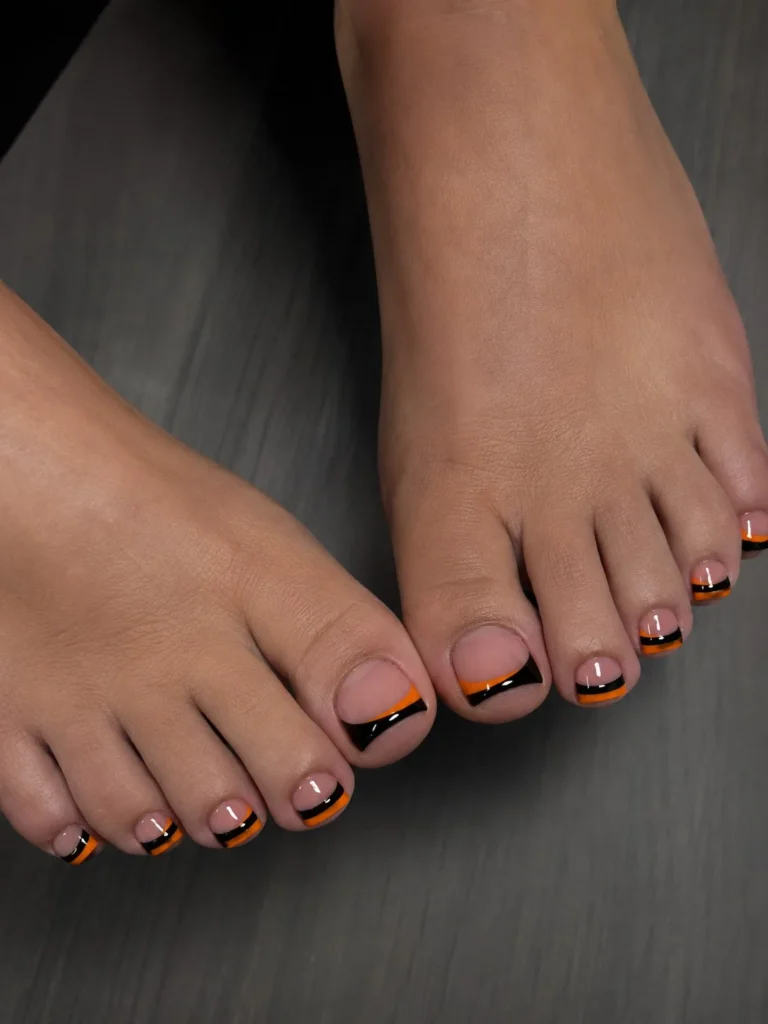
Sometimes the traditional combination is exactly what you want. Alternate glossy orange and black across the toes, then give the big toes a small pumpkin, bat, or simple dot pattern if you want a little artwork. The colors do most of the work, so this is one of the easier designs to recreate without strong freehand skills. It also photographs well because the contrast is so clear.
Pro Tip: Choose the same finish for both colors to keep the alternating pattern looking intentional.
7. Mummy Wrap Toe Nails with White Bandage Details
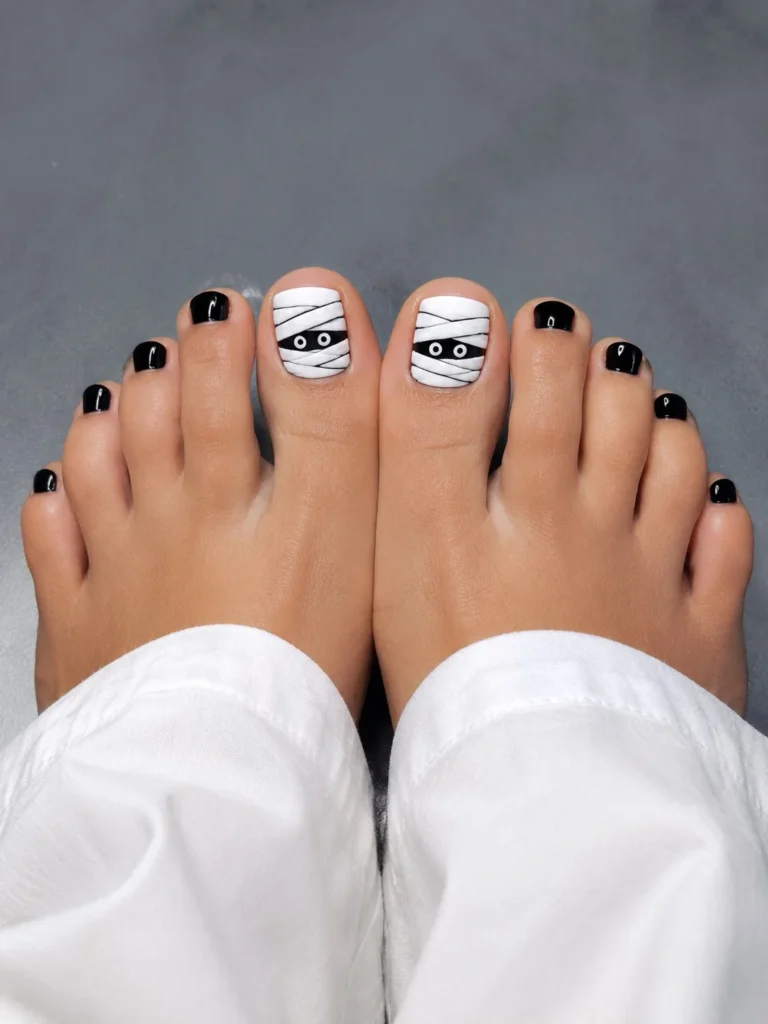
A mummy design is surprisingly easy to make look good on short toenails because the artwork relies on lines rather than a large picture. Use a pale or nude base, add uneven white bandage shapes, and finish with two tiny dark eyes peeking through one section. The slightly messy lines are part of the charm, so perfection is not necessary here.
Pro Tip: Create the bandage effect with overlapping, uneven lines instead of making every stripe perfectly straight; the messy edges make the mummy look more realistic.
8. Haunted Graveyard Toe Nails with Tiny Bats
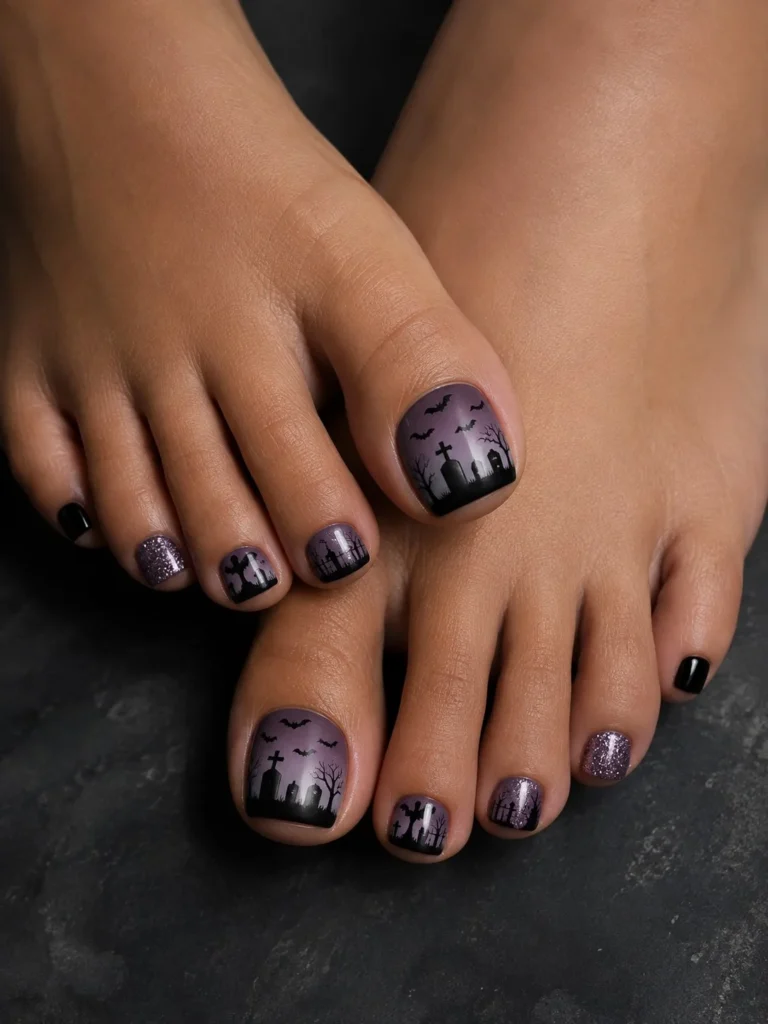
For a darker scene, turn the big toes into miniature night skies. A deep navy or black background gives you space for tiny grave markers, a pale moon, and a few flying bats. The smaller toes can carry simple stars instead of trying to fit an entire graveyard onto each nail. This one takes more patience, but the finished effect can be beautiful under evening light.
Pro Tip: Keep the graveyard silhouettes near the bottom of the nail and leave the upper area darker so the moon and bats remain visible.
9. Black Cat Halloween Toe Nails with Golden Eyes
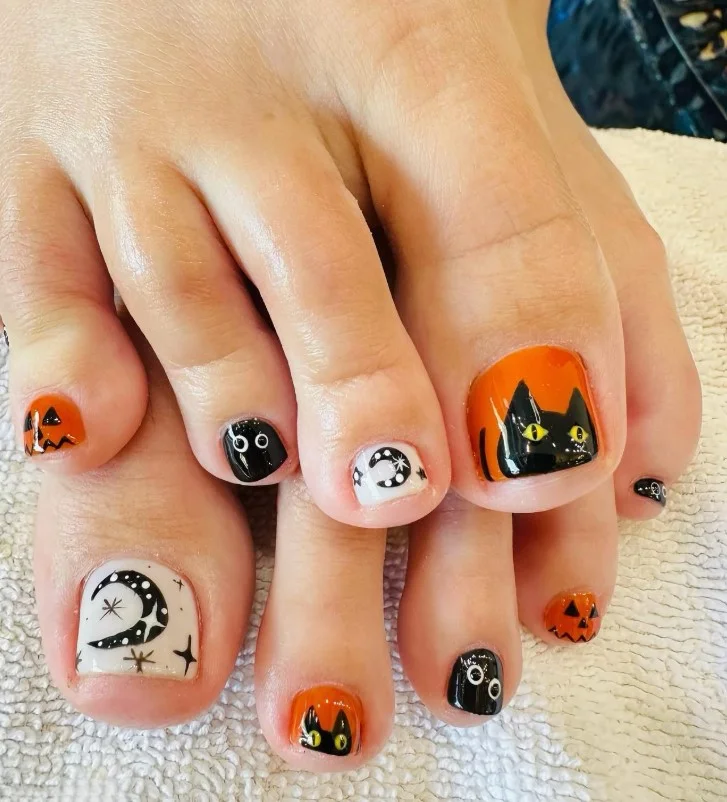
A black cat is a classic Halloween image, and the design can be much simpler than it sounds. Paint the big toes black, then add two small golden eyes and tiny ears at the top edge. Leave the remaining toes glossy black or use a dark plum shade for a softer variation. The gold eyes are the detail that makes this pedicure instantly recognizable.
Pro Tip: Metallic gold polish usually needs less space than you think; two tiny dots are enough to create convincing cat eyes.
10. Candy Corn Toe Nails for a Playful Fall Pedicure
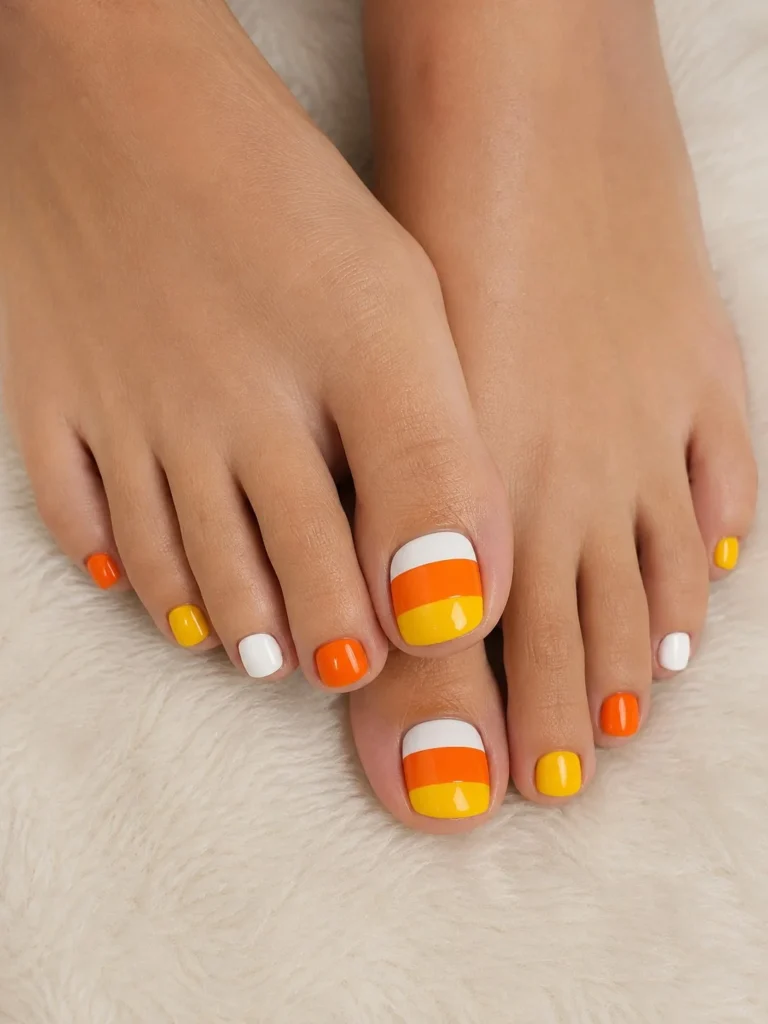
Candy corn gives you a cheerful option when spooky designs are not really your thing. Divide the big toes into cream, orange, and yellow sections, keeping each band neat and rounded. The other nails can use one of the three colors rather than repeating the full candy-corn pattern. It is bright, nostalgic, and easy to match with warm fall shades.
Pro Tip: Use thin striping tape if you want clean color boundaries without having to paint each section freehand.
11. Matte Black Toe Nails with Glossy Spider Accents

A completely matte black pedicure can look surprisingly elegant for Halloween. Add glossy black spiders or small web shapes over the top, and the design only reveals itself when the light hits it. There is no need for another color, which makes this a good option if you prefer a darker wardrobe and simple accessories. The contrast between the two finishes does most of the work.
Pro Tip: Let the matte top coat dry fully before adding the glossy artwork so the finishes stay visibly different.
12. Wicked Green Toe Nails with Black Halloween Details
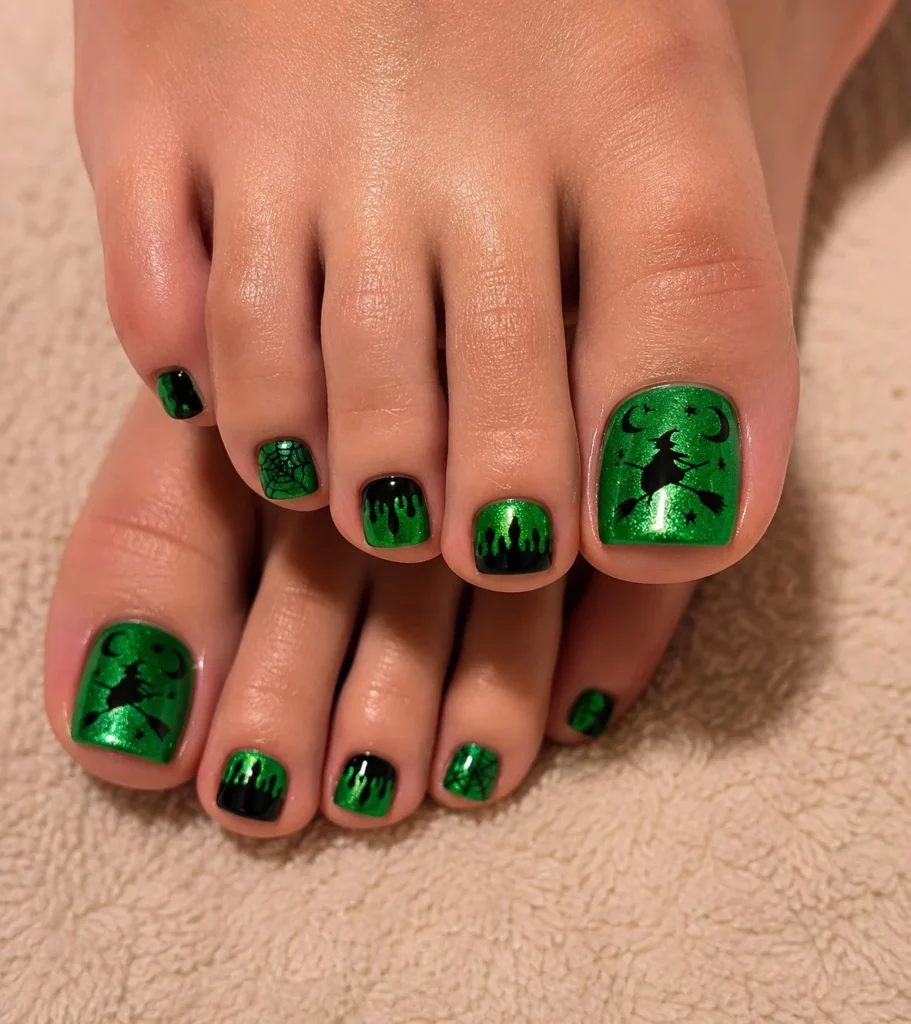
Green can take a Halloween pedicure in a completely different direction, especially when you choose a deep slime, emerald, or witchy green. Black stars, tiny moons, curved lines, or small spider details can be added over the color without making the toes look crowded. A darker green feels more wearable for fall, while a brighter shade gives the look a fun, almost potion-like quality.
Pro Tip: Test the black artwork over the green first; very fine details can disappear if the two shades are too close in depth.
13. Velvet Vampire Red Cat-Eye Toe Nails
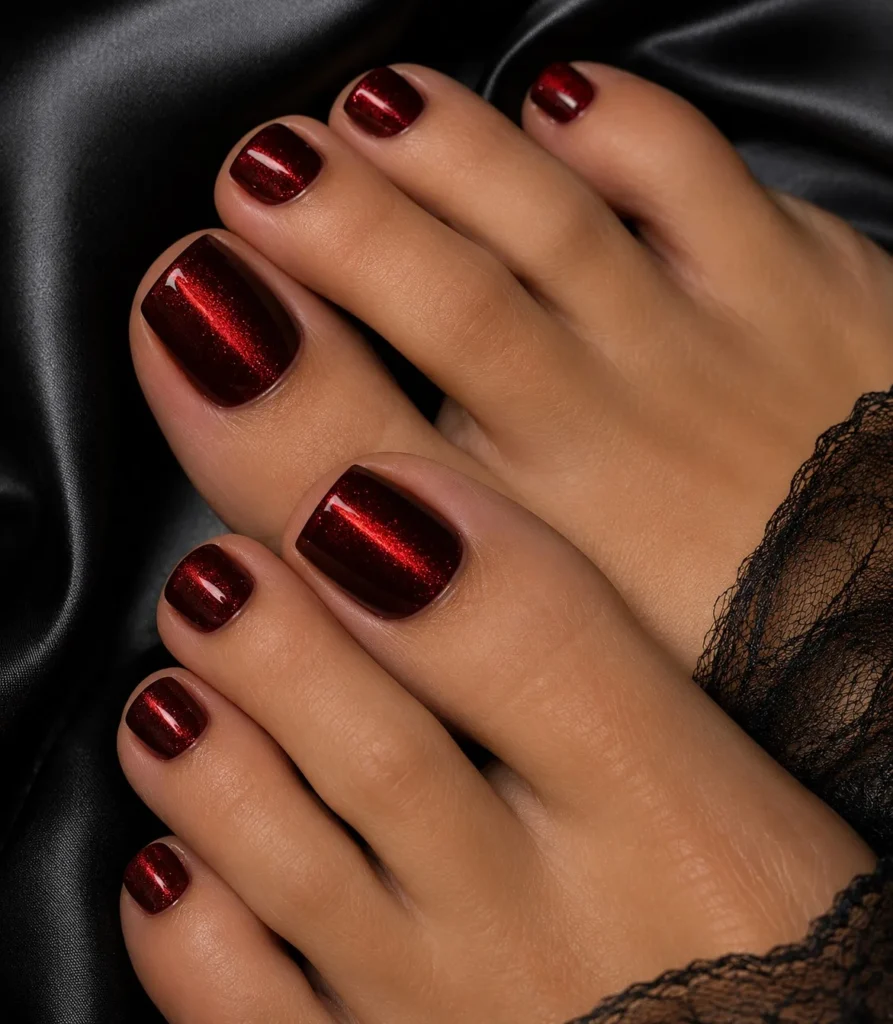
If you want something that feels grown-up rather than obviously themed, try a deep vampire red with a cat-eye finish. The magnetic effect creates a shifting band of light across the polish, so the toes look different as you move. The deep red and black combination gives this pedicure a classic vampire-inspired feel while the magnetic finish adds a sophisticated touch.
Pro Tip: Cat-eye polish needs the magnetic effect created while the product is still workable, so this one is better left to a nail tech if you have never used magnetic gel before.
14. Crescent Moon and Star Halloween Toe Nails
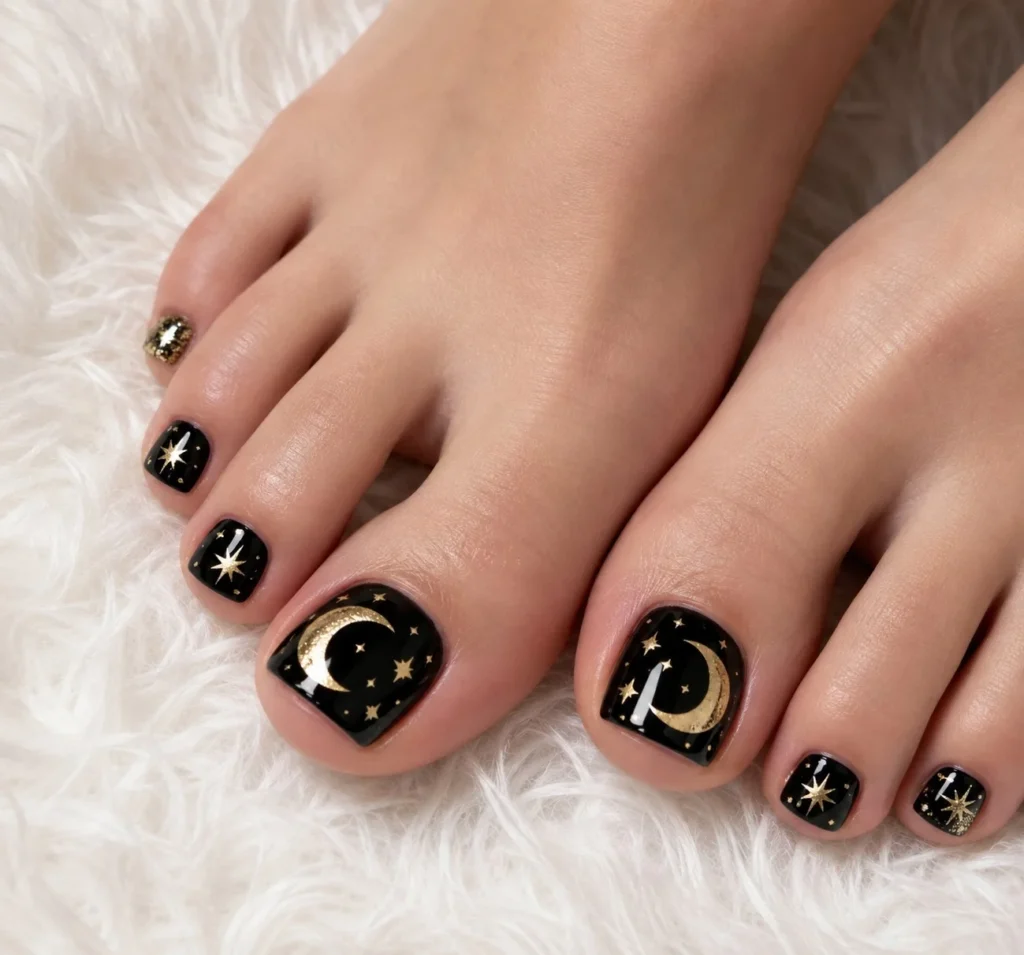
You do not need a recognizable Halloween character on every toe to make the pedicure feel festive. A deep navy, charcoal, or black base with tiny crescent moons and scattered stars gives you a quieter night-sky theme. Keep the artwork concentrated on the big toes and let the smaller nails carry the same dark base. This direction works especially well for an evening event because it feels seasonal without looking like novelty nail art.
Pro Tip: Use a pale gold or soft silver for the moons and stars instead of bright white if you want a softer finish.
15. Pastel Pink-o-Ween Pumpkin and Ghost Toe Nails

Halloween can be pink, too. A blush or pastel-pink base softens little pumpkins, ghosts, and tiny bows without losing the playful October theme. The trick is to use only a few black details so the colors stay light and pretty rather than turning into a busy character set. This is a fun match for pink outfits, ballet flats, or a softer Halloween costume.
Pro Tip: Keep the pumpkin and ghost shapes small enough to leave plenty of pink showing around them; the negative space keeps the design fresh.
16. Smoky Orange Ombre Toe Nails with Black Webs
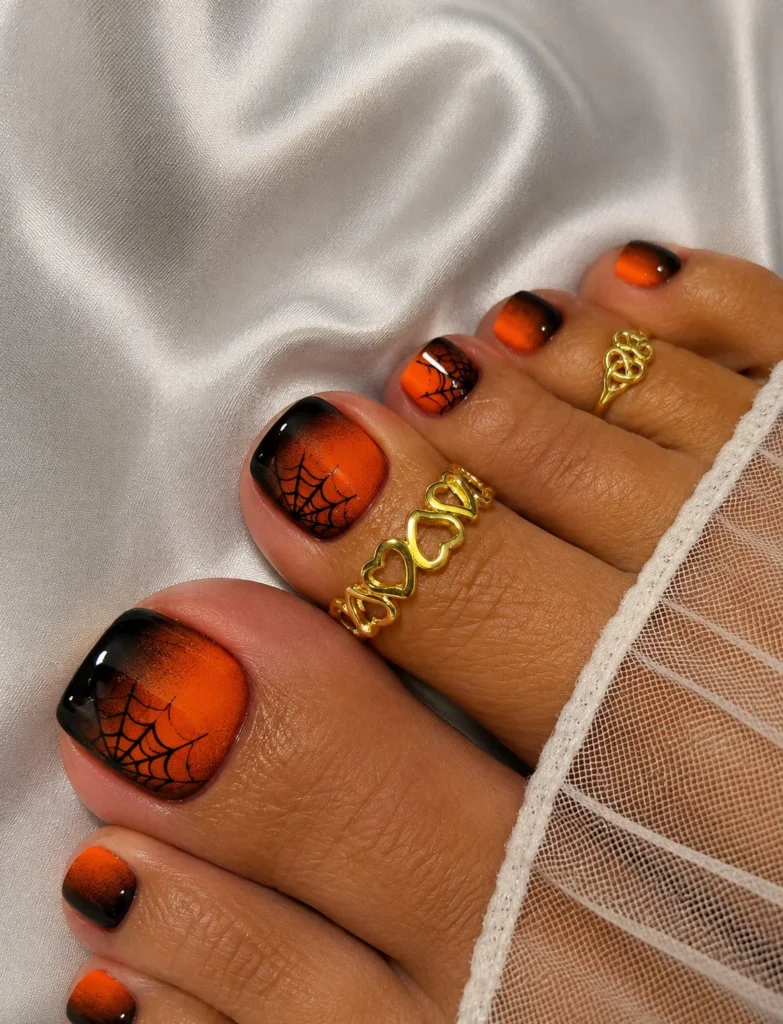
A smoky orange-to-dark gradient gives the pedicure more depth than a flat orange polish. Add delicate black spiderwebs over the lighter areas, where the line work will be easiest to see. The result has a little drama but still feels connected to classic Halloween colors. If you have shorter toenails, keep the gradient subtle and put the web on the big toe rather than trying to squeeze it onto every nail.
Pro Tip: Blend the orange while the base colors are still workable; once the polish sets, trying to soften the transition can leave the surface uneven.
17. Black and Gold Gothic Toe Nails with Cross Details
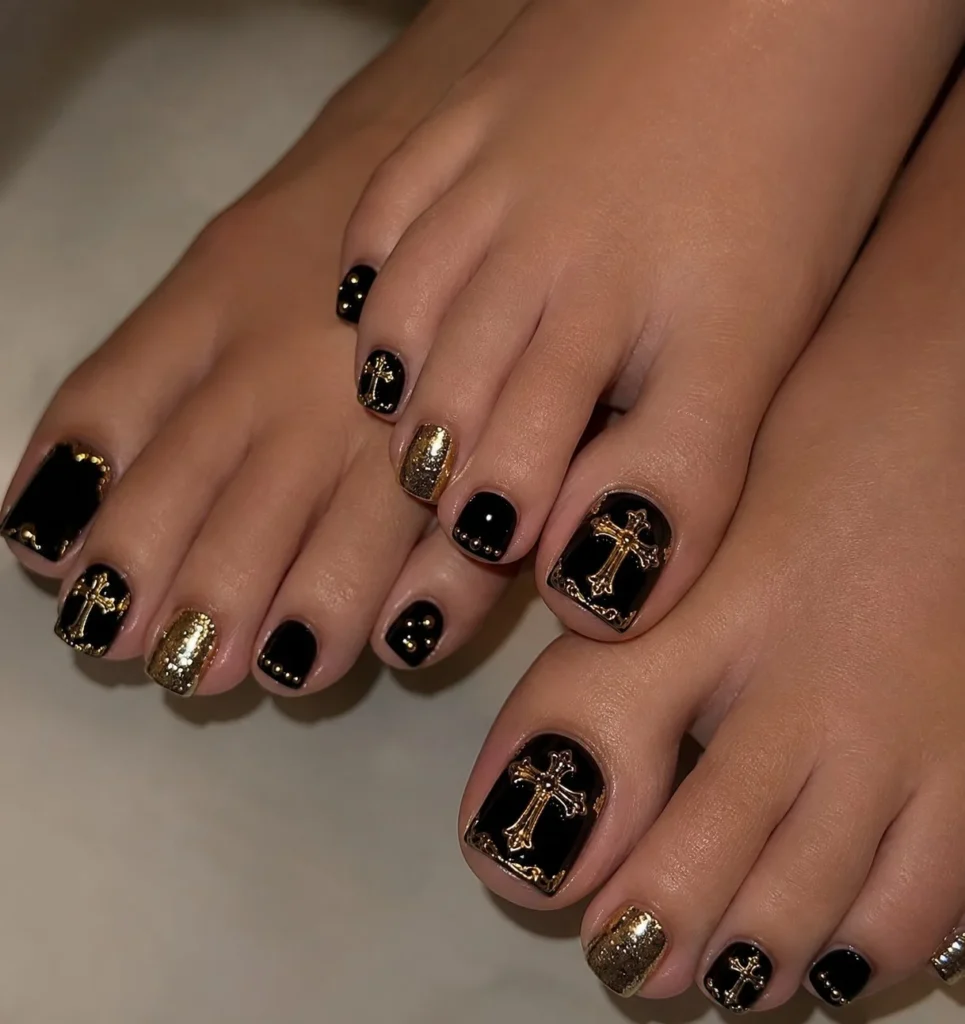
Black and gold create an instantly dressier Halloween combination, especially when the gold is used sparingly. A small cross, fine border, or tiny gothic accent on the big toes can give the pedicure a darker character without covering the whole nail in artwork. The look pairs nicely with gold jewelry and black evening sandals, so it can move from a Halloween gathering to a night out without feeling out of place. For intricate symbols, a salon appointment may be worth it.
Pro Tip: Metallic gold is easiest to notice when the black base is completely opaque, so give the dark polish enough coats before adding the details
18. Rhinestone Spiderweb Toe Nails for Halloween Glam
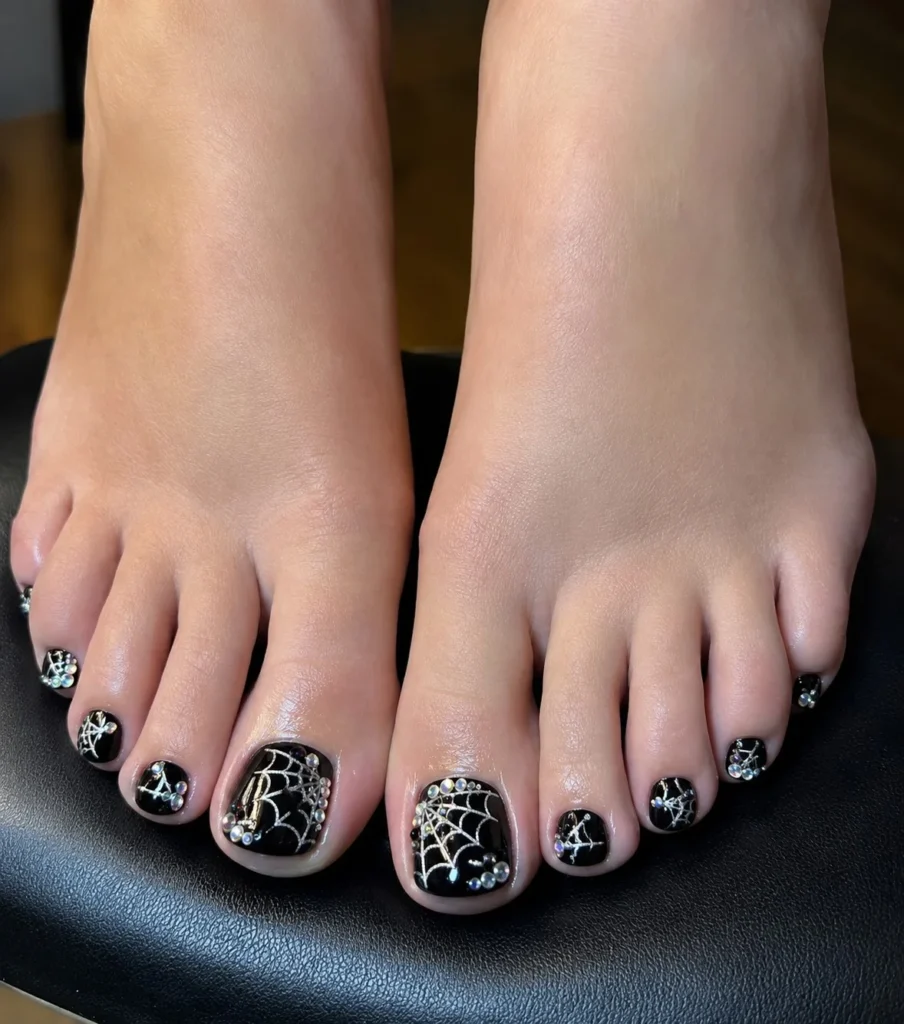
For a dressier pedicure, trade some of the painted web lines for tiny rhinestones. Start with a deep black, plum, or sheer nude base, then place the stones along a simple web pattern on the big toes. You get the Halloween reference without covering the entire nail in spiders and pumpkins. It is the kind of design that looks especially pretty under evening lighting.
Pro Tip: Use a small amount of nail adhesive made for the embellishments and press each stone into place before sealing around it.
19. Haunted Forest Toe Nails with Bats and Moonlight
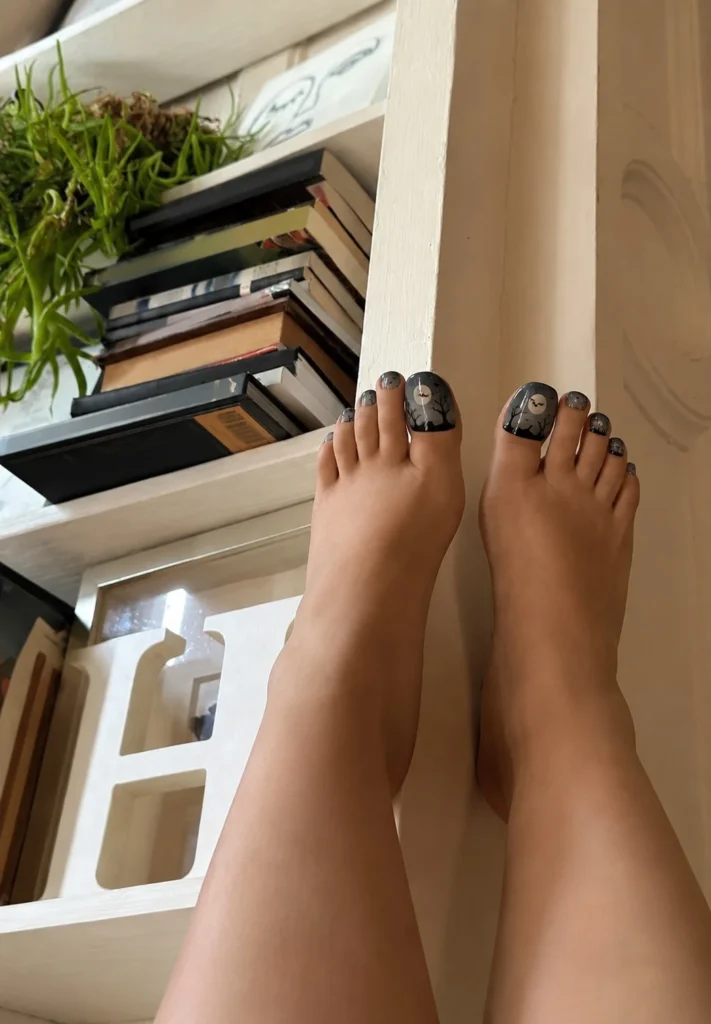
Turn the big toes into tiny nighttime scenes with a dark blue or black background, thin tree silhouettes, and a pale moon. A few flying bats near the moon are enough to tell the story; adding too many shapes can make the scene hard to read on such a small canvas. The smaller toes can simply use the background shade with a few scattered stars. This design takes more patience than a simple color-blocked pedicure, but the finished result has a real storybook quality.
Pro Tip: Paint the moon before the darker tree silhouettes so the foreground stays sharp and the light source remains visible.
20. Minimalist Halloween Toe Nails with Tiny Spooky Accents
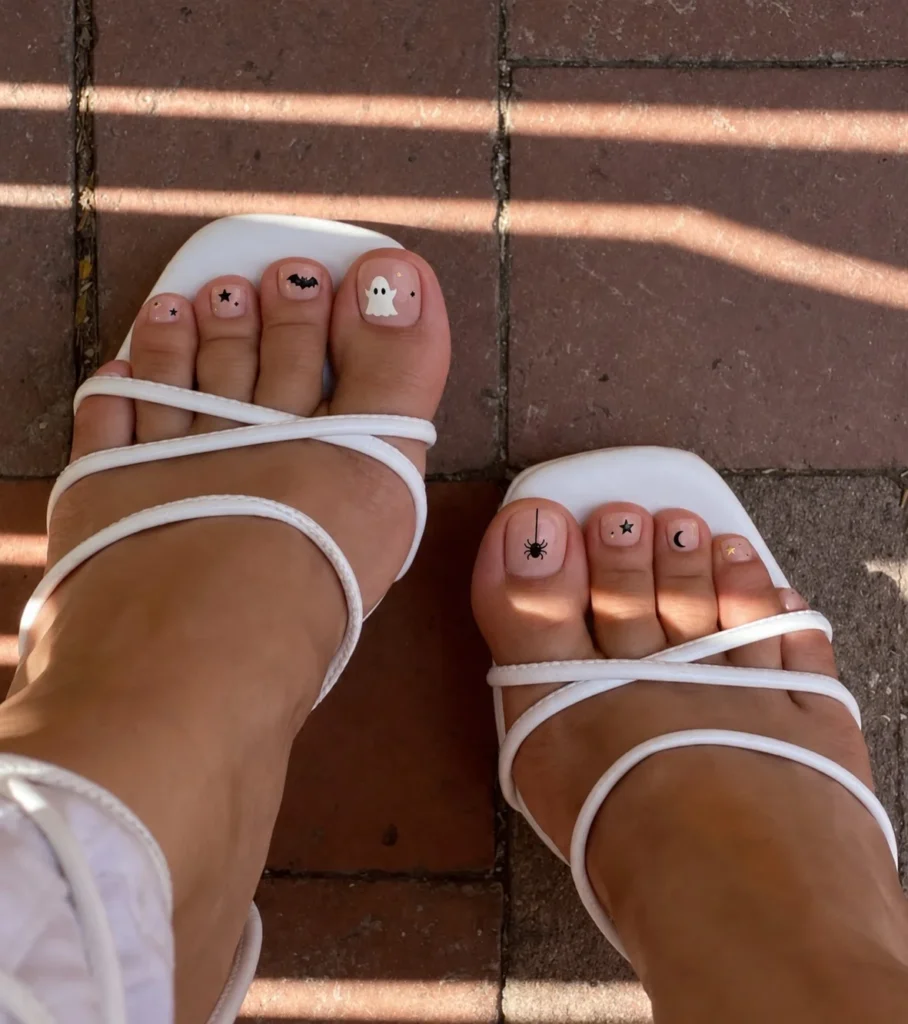
Not everyone wants a full Halloween scene on their feet, and this is where minimalist nail art works beautifully. Start with a sheer nude, milky white, or soft beige base and add one tiny bat, ghost, moon, spider, or star to selected toes. Leaving most of the nail untouched makes the small details stand out instead of getting lost in a crowded design. It is also one of the easiest styles to wear after October ends.
Pro Tip: Choose one main symbol and repeat it sparingly rather than mixing five different Halloween icons; the simpler approach will look more intentional.
How to Choose the Best Halloween Toe Nail Designs
The best Halloween pedicure is not always the most detailed one. Think about your nail length, how much artwork you actually enjoy wearing, and whether you need something for one night or several weeks. A design that looks beautiful in a close-up photo may need to be simplified when the same artwork is painted on a smaller toenail.
| What to Consider | Quick Tip |
|---|---|
| Toenail length | Choose simple symbols when your nails are short, and save detailed scenes for larger nails. |
| Your style | Pick pumpkins and ghosts for a cute look, or black, crimson, and gold for something darker. |
| DIY skill | Stick with color blocking, French tips, and simple shapes if you are doing the pedicure yourself. |
| Design placement | Put detailed artwork on the big toes where there is more room to work. |
| Finish | Gloss gives classic shine, while matte, chrome, and cat-eye finishes create more depth. |
| How long you want to wear it | Minimal designs and neutral bases can work beyond Halloween more easily. |
| Your shoes | Check the design with the sandals or open-toe shoes you plan to wear before choosing your final colors. |
Styling and Maintenance Tips for Halloween Pedicures
- Start with clean, dry nails. Remove old polish and gently clean the nail surface before applying anything new.
- Give the polish enough drying time. Rushing into socks or closed shoes is an easy way to ruin fresh toenail art.
- Use thin coats. Several light layers usually give you better control than one thick coat.
- Protect detailed artwork. A suitable top coat can add shine and help protect painted designs from everyday wear.
- Be careful around loose embellishments. Rhinestones and other decorations need secure application, especially if you will be wearing sandals often.
- Keep cuticles comfortable. A little cuticle oil can help prevent the skin around the nails from looking dry.
- Do not pick at chipped polish. Remove the manicure properly instead of pulling product away from the nail.
- Simplify when necessary. If a design is too detailed for your toenail size, use the big toe for the main artwork and keep the others plain.
Final Thoughts
The best Halloween toe nail designs are the ones that fit your style, not simply the ones with the most artwork. Cute pumpkins and ghosts work when you want something playful, while crimson, black, purple, and gold create a moodier finish. If you are short on time, choose a strong color combination and add one small detail to the big toes.
For a first Halloween pedicure, I would start with something you can actually maintain. A clean design that still looks good after a few days is far more satisfying than complicated nail art that feels rushed. Pick the mood first, simplify the artwork around your nail length, and let the details do the rest.
FAQs
What are the easiest Halloween toe nail designs to do at home?
Orange and black color combinations, candy corn sections, simple ghosts, and minimalist symbols are among the easier choices. They do not require a large amount of detailed freehand work.
What Halloween nail designs work best on short toenails?
Small ghosts, bats, pumpkins, moons, and simple French tips can work well on shorter nails. Put detailed artwork on the big toes and use solid color on the smaller ones.
How can I make Halloween toe nail designs last longer?
Apply polish to clean, dry nails, use thin coats, allow enough drying time, and finish with a suitable top coat. Avoid picking at chips or using your toenails to open or scrape things.
Are Halloween toe nail designs suitable for open-toe shoes?
Yes. In fact, open-toe sandals are a great way to show off a Halloween pedicure. Let the shoe color influence your polish choice if you want the whole look to feel coordinated.
Can I wear Halloween toe nail designs after October?
Absolutely. Designs based on black, burgundy, purple, gold, nude, or simple moon details can transition into late fall more easily than highly specific Halloween characters.